Tips and Tricks
How to install Android 10/One UI 2.5 on your Galaxy S7 and Note 7 devices [Manually]

Samsung’s older flagship, Galaxy S7, S7 Edge, and Note 7 are the premium smartphones launched in 2016. These devices brought great hardware and software functionalities for the consumer, keeping aside the Note 7 battery malfunctioning.
Talking about the software, these devices were launched with Samsung’s proprietary TouchWiz software suite along with the Android 6. Later on, moved to Samsung Experience UI and received two major updates including the Android 7 and Android 8 Oreo.
Currently, these smartphones aren’t eligible for any major software updates and stuck with Android 8 Oreo. But there’s a way that could allow you to use the latest Android 10 based One UI 2.5 on your Galaxy S7, S7 Edge, or Note 7 (If it’s still safe).
The One UI offers a brand new user interface and a completely new experience for a better user experience.
Below you can check the instructions on how you can install the latest One UI 2.5/Android 10 port on your Samsung Galaxy S7, S7 Edge, and Note 7 smartphones.
First, you need to know some information before you flash your device:
- This is a full Galaxy Note 9 port with the Android Version 10 and One UI 2.5.
- This is not an official ROM
- Read the full steps carefully to install the ROM successfully on your device.
- You are not allowed to use this base, aroma, or any parts of it for your own “ROM”. if you want to make a Q port, “DIY”.
- This ROM should only be installed on the Exynos 8890 version and is not meant for the Snapdragon variant.
You can download the update file for your Galaxy S7 and Note 7 (Exynos 8890 devices) devices from here.
Follow the steps below to download and install ROM on your device:
- Ensure you have up-to-date TWRP (MoroTwrp Recommended or My TWRP). Download from here
- Ensure you are running the recent Oreo bootloader and modem.
- Download and copy the ROM to your device.
- Wipe everything (SYSTEM, DATA, CACHE, DALVIK, and if possible internal storage).
- Flash the ROM.ZIP (Select only what you will use in bloat otherwise it will fail due to system size).
- Setup your ROM.
- After a full successful boot. you can flash Magisk if you need ROOT
or (In detail)
- Open TWRP recovery mode on your device
- Click on Wipe and then select Advanced Wipe
- Now select the following options: Dalvik/ART cache, System, Data, Internal storage (optional), and Cache.
- Then swipe to wipe
- After wiping the Data go back to the TWRP window and select ‘Install’
- Now select the update file to do so.
- Tap on External_sd
- Now select the update file as Floyd Q-V10-Exynos8890.zip
- Then again swipe to continue
- Now, wait for the process to end. It will take some time to install on your device. After the installation is complete click Next.
- Agree to the terms and conditions and now again click Next.
- A changelog will appear on the screen and the system will ask you to select the desired file.
- After selecting the files click on install.
- The final installation process will end in some time and after the reboot, you can enjoy Android 10 on your device.
ROM Information:
- ROM OS Version: Android 10
- ROM Kernel: Linux 3.x
- ROM Firmware Required: Latest Bootloader/Modem and TWRP 3.3+
- Based On: One UI 2.5
Version Information:
- Status: Stable
- Current Stable Version: V5.0
- Stable Release Date: 2020-12-10
Features of Floyd/Hades Port Features:
- Samsung S9 DolbyAtmos
- Optimized for S7 Flat / EDGE with their own separate configurations
- Many props and feature tweaks and exclusive apps
- DE-Knoxed and disabled Additional Samsung root prevention and security spams
- Full OMC setup with Many Samsung supported countries
- MultiWallpaper support
- S9 Infinity Wallpapers pickable in aroma
- Selectable SmartManager (Intl / CN)
- @corsicanu Patched GoodLock manager
- Debloated via Aroma (Email, Calculator, Video, Music, Voice Recorder, etc)
- Custom boot animations (Samsung Wh/Bl, Floyd, Hades)
- Yuva features (UsbBackup, SPowerPlanning, SProtect, Ultra Data Saving, Memory Saver, and Samsung Max)
- Custom Fonts/Emojis included (And 1120 Font mods/Google fonts etc)
- Vanced Manager
- Patched for Single/Dual SIM + SDCard
- Patched Dual Messenger for All user apps
- Selectable Edge Panels and edgelighting+
- SamsungDaily (BixbyHome), Bixby Voice, and Bixby Vision
- Recovery toggle (Long Press restart)
- Samsung Max and other Misc WiFi features
- Native AppLock
- Wifi S-Secure
- Native Screen Video recorder
- Native Call recorder
- Enabled some CSC features (call record, status bar network speed, etc.)
- SecureFolder
- Google LiveCaptions
- Patched Knox WorkProfile
- Option to force enable RCS
- And the list keeps going!
Bugs:
- GearVR headset does not work
- Iris Scanner Does not work on Note devices
Screenshots:

Notes:
- You might face some bugs, errors, and issues because it is not an official ROM
- Updating your device with the custom ROM is your own choice, no one is responsible if anything goes wrong
//Source


In today’s era, ensuring our online activities remain secure is very important. For that, Samsung has a powerful feature called Auto Blocker, which enhances user privacy and protects devices from cyber threats effectively. You can easily activate the Auto Blocker feature on your Samsung One UI 6.1 devices.
Auto Blocker feature is mainly valuable for safeguarding against malware and viruses that often infiltrate your device via applications outside the official platform such as the Google Play Store and Samsung Galaxy Store.
It prevents devices from downloading applications without user confirmation from suspicious sources. Users can enjoy a safer browsing experience with minimized exposure to potential threats.
Moreover, the feature also blocks unauthorized commands attempting to access the device through the USB port. This feature is especially useful when connecting devices to transfer files.
You can easily activate Auto Blocker on your One UI 6.1 Samsung device, just need to follow a few steps:
- Navigate to the Settings app on your smartphone.
- Scroll down and select Security and Privacy from the list of options
- Find the Auto Blocker menu. From there, toggle the feature on to enable its protective functionalities.

Users can also customize settings further, such as activating the Messaging app protection option or blocking software updates via USB, depending on their security preferences.
By enabling Auto Blocker, users significantly reduce the risk of malware and viruses infiltrating their devices through untrusted sources. This feature not only safeguards your personal data but also enhances the overall security of your Samsung device.

Samsung has updated several Galaxy devices to One UI 6.1, with plans to extend this update to all eligible devices soon. This latest update not only enhances the overall performance but significantly boosts the device’s security. If you want your Samsung One UI 6.1 device to remain safe even during servicing, you can use the Maintenance Mode.
Maintenance Mode is an innovative feature that safeguards users’ personal data during device repair. As smartphones store increasingly sensitive information, it is important to protect this data when giving the device for repairs.
This mode allows service technicians to access the necessary functions of the phone without exposing any personal information. It enhances the privacy and security of Galaxy devices.
The feature also ensures that applications installed by the user are not removed. Any data or accounts created while in Maintenance Mode will be automatically deleted once the mode is turned off.
To activate Maintenance Mode on your Samsung One UI 6.1 devices, follow these steps:
- Go to Settings on your device.
- Select Device Care.
- Choose Maintenance Mode.
- In the menu, select the Secure Wi-Fi option.
- Click on Turn On to enable the feature.
- Restart the device as instructed to secure your personal data.

You’ll need to unlock your phone to turn off Maintenance mode. When you do, everything will go back to the way it was when Maintenance mode was first turned on.
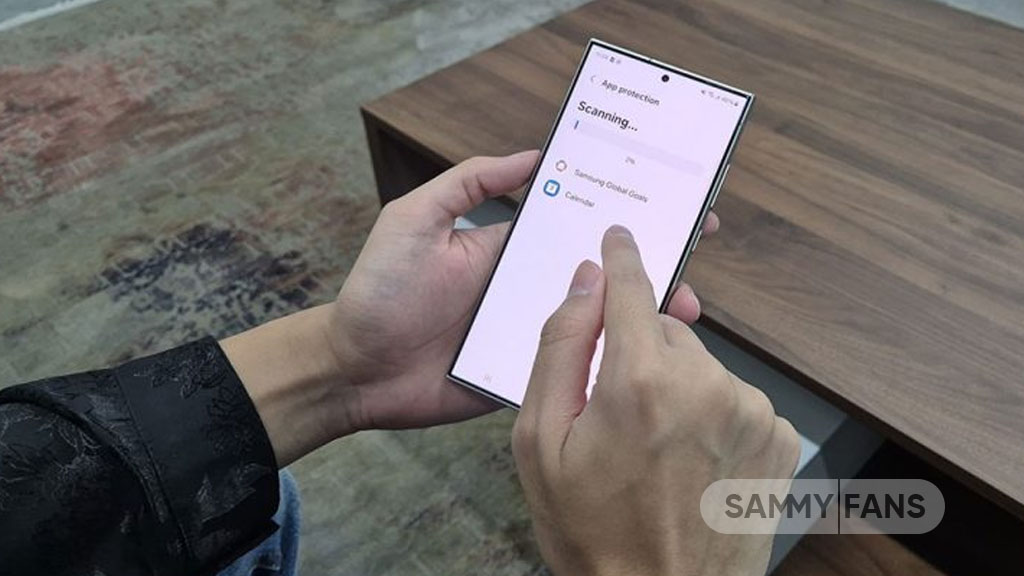
In an age where digital security is more important than ever, Samsung keeps Galaxy devices secure with its App Protection feature. Let’s see how you can enable the App Protection feature on your One UI 6.1 device and keep your Samsung smartphone more secure.
Samsung’s App Protection Feature scans your device to save it from the unseen dangers of malware and viruses. It works seamlessly in the background, automatically scanning all applications and files on your device.
If a security issue is noticed, you can uninstall or stop the download process of the related application to avoid data theft.
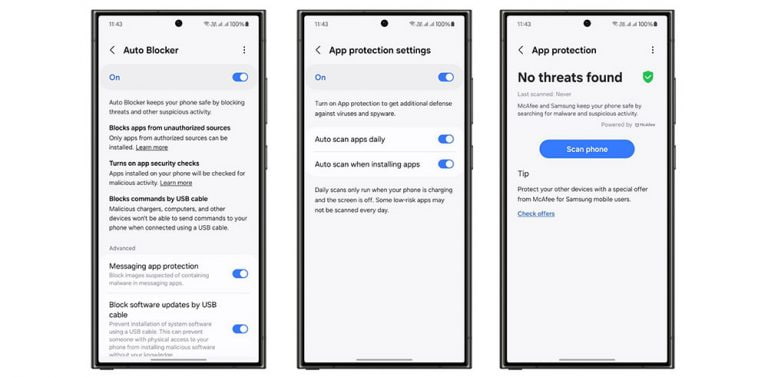
Here’s how to activate the App Protection feature
You can activate the App Protection feature on your One UI 6.1 device with just a few taps.
- Open Settings and select Device Care.
- Turn on App Protection within the Device Care menu.
- After enabling, the device will start scanning.
- For additional settings, tap the More icon and go to Settings.
- Enable options such as Auto-scan apps daily and Auto-scan when installing apps.
- By enabling Auto Blocker, App Protection will also be activated.
By following these steps, you can set up your Galaxy smartphone to automatically monitor and protect your device. This feature simplifies the process of maintaining your digital safety, allowing you to focus on your day-to-day activities without worry.
Stay up-to-date on Samsung Galaxy, One UI & Tech Stuffs by following Sammy Fans on X/Twitter. You can also discover the latest news, polls, reviews, and new features for Samsung & Google Apps, Galaxy Phones, and the One UI/Android operating system.
Do you like this post? Kindly, let us know on X/Twitter: we love hearing your feedback! If you prefer using other social platforms besides X, follow/join us on Google News, Facebook, and Telegram.