Tips
Download and install One UI 4.0 (Android 12) fonts on your Samsung phone – Google Sans Font
Bringing the latest Android 12 along with One UI 4.0 has reached a huge number of Samsung fans. Absolutely, the One UI 4.0 version offers a huge package of new features and changes, making the whole mobile experience even more delightful.
Adding to this, to add more fun to Galaxy smartphones Samsung brings the Good Lock 2022. This app introduces several excellent services including modules and apps that make the One UI software system highly customizable.
Nevertheless, still, one thing that is missing out, that Samsung has not provided to is Galaxy users is an option for choosing Fonts. So, if you want to change your old or default Samsung font, you are at the right place. In this article, we’ll explain to you how to install Google Sans Font for Samsung Galaxy devices.
Interestingly, these fonts can be downloaded and installed on any Samsung Galaxy phone running One UI 4.0 to One UI 1.0. You can install any font using the .TTF file format. These include Google Sans, Roboto, Product Sans, Rubik and more.
Thanks to undertakings like Flipfont and zFont 3, it is now possible to install ay font or .TTF font on any Samsung device.
How to download font files in TTF format?
The FlipFont app will use introduces the installation of custom fonts using the .TTF extension. That is why it is important that you download fonts from the web only in .TTF format. You can also use stock fonts listed in the app, such as Samsung Sans or 1800+ stock flip fonts.
Here we have listed the most popular fonts in the Android community. One such font is Google Sans Font which is exclusive to Pixel smartphones.
Download the Font Installer app for Samsung One UI 4
There are two known font apps available for Samsung Galaxy devices that can install the latest One UI 4 update or compatible fonts on One UI 3 (Android 11), One UI 2 (Android 10) or OG One UI (including Android 9).
Download one of the following Font changer apps:
- zFont 3 APK from Play Store | Telegram Channel link | Source
- FlipFont APK from here (direct link) | Telegram Channel Link | Source
Install any font on the Samsung Galaxy phone using zFont 3
- Make sure your phone has a Samsung account signed in to back up the settings.
- Download and install the zFont 3 app from the top.
- Launch the ZFont 3 app.
- Go to the “Dashboard” tab.
- Select language.
- Search for any font like “Google Sans”.
- Select and Apply.
Follow the steps listed in the app. (Requirements)
- It prompts you to install the Samsung Sans font.
- Update the application.
- Apply Samsung Sans font from the phone settings.
Backup “Settings”. Just select “Settings”. - Uninstall Samsung Sans fonts.
Now, change the How-to section
- Select “Install Google Sans Fonts”
- Now, change the font to default.
- Select the Restore Data option and just tick Settings.
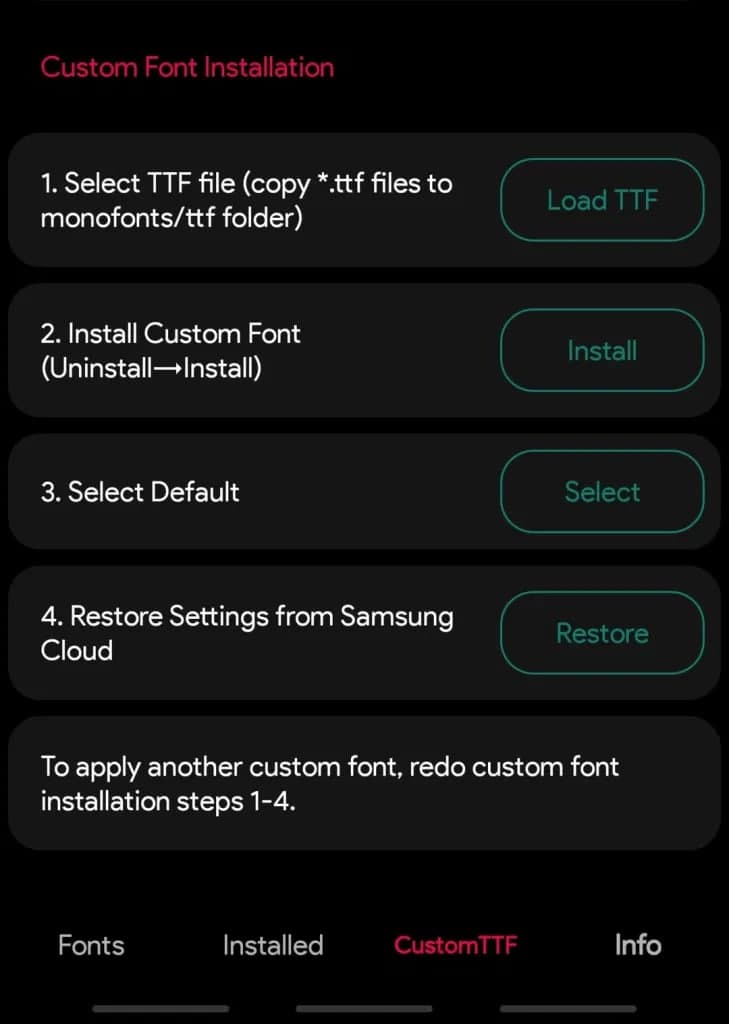
Alternatively, you can download the TTF font file and apply it using the last “Local” tab.
- “Select TTF File” from the Custom TTF section
- Tab “Load TTF”.
- Tab the Install Custom Font option.
- It is necessary to uninstall and install the Samsung Sans font.
- Restore settings from Samsung. Tick ”Settings only”.
- It must have a custom font installed on your device.

Install any font for Samsung Galaxy phone using Flipfont
- Download and install the FlipFont APK from here (direct link). OR from the downloads repository.
- Download any font from the download section above.
- Extract the zip file to get the .ttf font. Look for a simple font.
- Move the font file to the phone storage located at this location: monofonts/ttf
- If it does not exist, create a ttf folder.
- Launch the FlipFont app on your Samsung phone. It should be named #mono_
- Make sure your phone has a Samsung account signed in to back up the settings.
- Click on Install. Install Samsung Sans font.
- Click on the option. Select Samsung Sans font.
- Back up “Settings” to your Samsung cloud. Just tick “Settings”.
- “Select TTF File” from the Custom TTF section
- Click “Load TTF”.
- Click the Install Custom Font option.
- It is necessary to uninstall and install the Samsung Sans font.
- Restore settings from Samsung. Tick ”Settings only”.
- It must have a custom font installed on your device.
Note: For Backup & Restore, just go to Settings -> Accounts & Backup -> Backup & Restore -> Backup Data -> “Settings”.
Get notified –
Aside from SammyFans’ official Twitter and Facebook page, you can also join our Telegram channel, follow us on Instagram and subscribe to our YouTube channel to get notified of every latest development in Samsung and One UI ecosystem. Also, you can follow us on Google News for regular updates.
via – androidsage


Samsung Galaxy S24 series introduced several new features and enhancements with the One UI 6.1, one of which is Intelligent Optimization. This feature is designed to give users specific control over the image processing levels directly from the camera settings.
The Intelligent Optimization feature allows users to adjust how their photos are processed. Whether capturing everyday moments or professional shots, the Intelligent Optimization feature in One UI 6.1 ensures that your photos meet your standards with minimal effort.
How to activate it?
You can easily enable the Intelligent Optimization feature by following the steps below.
- Open the Camera app, then Settings.
- Tap on Intelligent Optimization.
- Choose the desired optimization level
- Maximum
- Medium: Speed up capture time by doing less optimization
- Minimum: Take pictures as fast as possible by not optimizing pictures after they are taken.
- Optionally, enable or disable the Scene Optimizer.
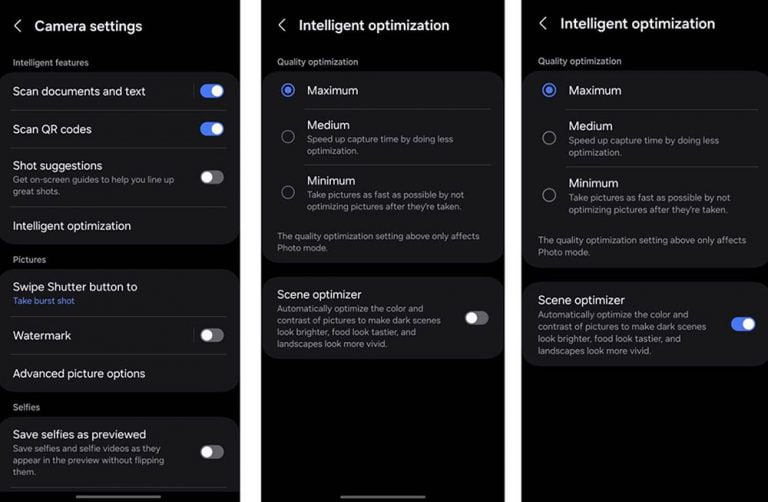
This feature allows for customization of photo attributes such as sharpness, contrast, and brightness. For example, selecting the minimum level results in more natural-looking images, while the maximum level increases detail and sharpness, which is ideal for zoomed-in shots. Notably, the quality optimization setting of these levels only affects Photo Mode.
If you enable Scene Optimizer, it automatically optimizes the color and contrast of pictures to make dark scenes look brighter, food looks tastier and landscapes look more vivid.
How to use One UI 6.1 Camera Shift feature on your Samsung Galaxy
Stay up-to-date on Samsung Galaxy, One UI & Tech Stuffs by following Sammy Fans on X/Twitter. You can also discover the latest news, polls, reviews, and new features for Samsung & Google Apps, Galaxy Phones, and the One UI/Android operating system.
Do you like this post? Kindly, let us know on X/Twitter: we love hearing your feedback! If you prefer using other social platforms besides X, follow/join us on Google News, Facebook, and Telegram.
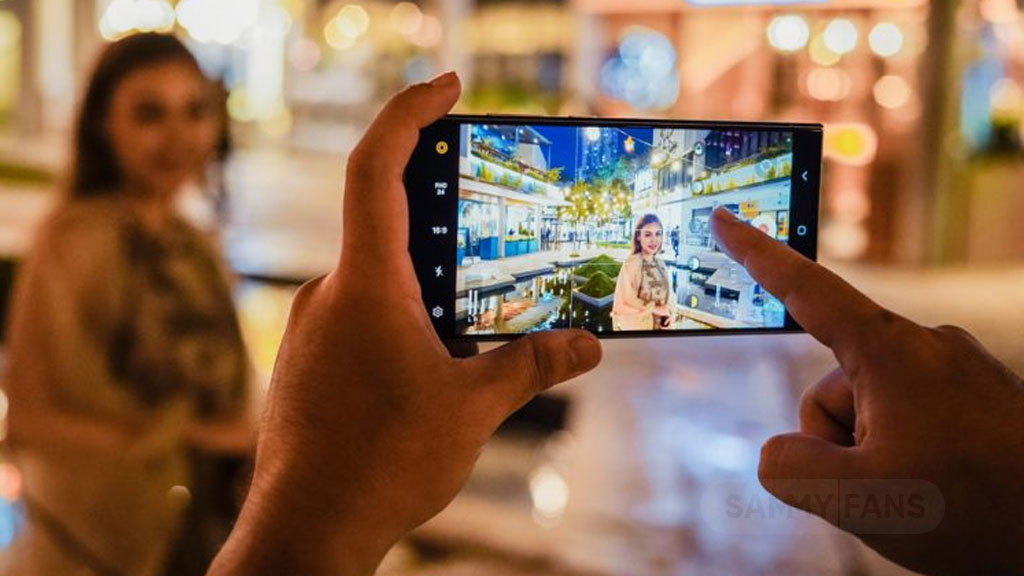
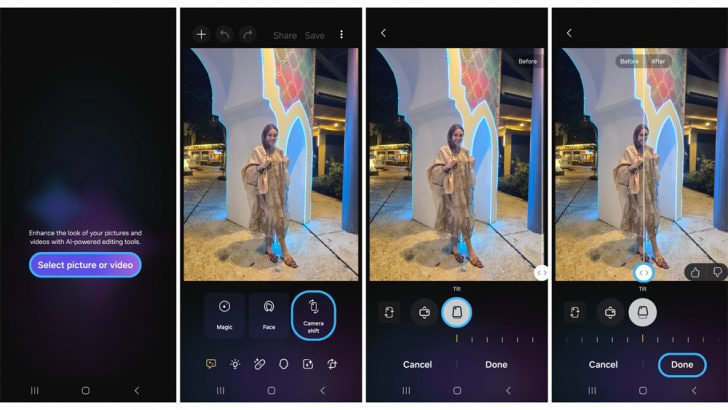
Samsung’s One UI 6.1 offers a range of new features and Galaxy AI Suite that significantly improves the user experience. With the latest Galaxy Enhance-X app, users of Samsung One UI 6.1 devices can enhance their photos using an innovative feature called Camera Shift. This feature is designed to provide more flexibility and control over the composition of photos.
The Camera Shift feature allows users to alter the perspective of a photograph after it has been taken. This is mainly useful in situations where capturing the perfect angle in real time is not possible.
Follow our socials → Google News | Telegram | X/Twitter | Facebook | WhatsApp
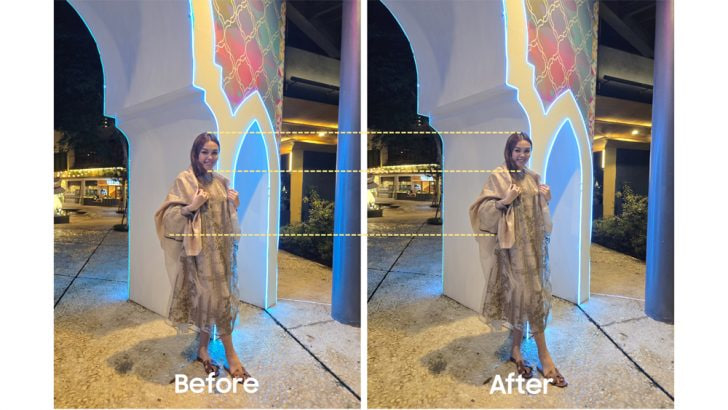
Moreover, the Camera Shift uses advanced AI algorithms to modify the angle and perspective of your photos, providing a result that aligns with your imagination. With events that unfold rapidly and capturing every detail that matters, Camera Shift ensures that you can revisit and adjust those moments.
How to use it?
You can easily use the Camera Shift feature on your Samsung Galaxy smartphone running One UI 6.1, just need to follow a few steps:
- Open the Galaxy Store app and download the Galaxy Enhance-X app.
- Select the photo you wish to edit and choose the “Camera Shift” option.
- A slider will appear, enabling you to change the photo’s perspective as you see fit.
Samsung Galaxy Enhance-X’s Camera Shift feature enhances mobile photography by making it easier to take pictures and expanding the creative options for users. If you have the latest version of Galaxy Enhance-X and One UI 6.1 running Samsung device then you can enjoy this feature.
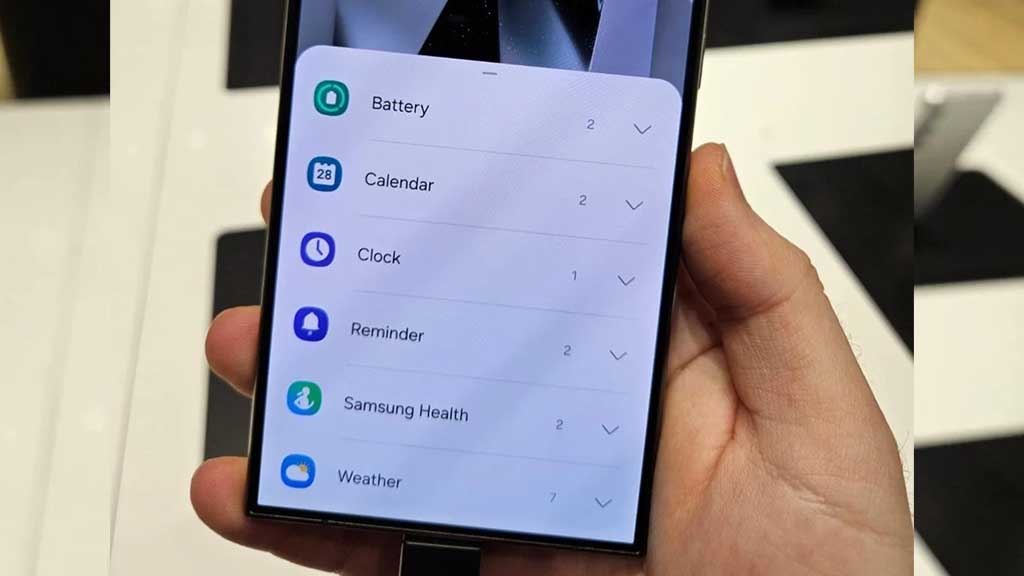
Samsung Galaxy S24 series introduced a significant enhancement to the user experience with One UI 6.1, which allows extensive customization of lock screen widgets. This impressive feature is a first for the flagship devices, allowing users to personalize their lock screen to a great extent.
One UI 6.1 lets users arrange different widgets on their lock screen according to personal preference. These widgets include a customizable clock display color, battery indicators, calendar, weather forecast, and even Samsung Health’s daily activity graphs.
Follow our socials → Google News | Telegram | X/Twitter | Facebook | WhatsApp
Arrange Widgets on Samsung One UI 6.1 Lock Screen
To customize the lock screen, users just need to follow a few steps:
- Simply touch and hold to your phone’s lock screen.
- Select ‘Widgets’ to view the available options and swipe up to see available widgets such as battery, clock and reminders.
Add
- Now, tap on Widgets, then select the desired widget option. You can repeat this process to continue adding widgets.
- To rearrange widgets, touch and hold the selected widget, then drag it to a new place next to the other widgets.
Remove
- If a user decides to remove a widget, they can do so by tapping the red minus icon. This will delete it from your lock screen.
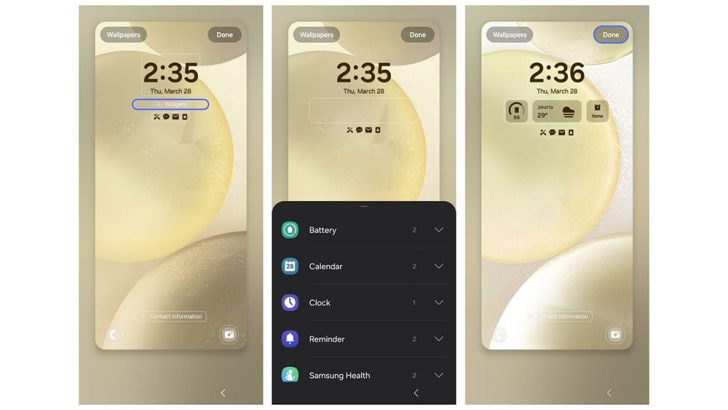
Once the customization is complete, users can save their settings by tapping ‘Done’. This personalized setup allows for efficient access to information directly from the lock screen. If you have a Galaxy device running One UI 6.1, then you can try Lock Screen widget customization.